
TL;DR

Get art and craft supplies delivered free with Prime
- Fast, free delivery on millions of items
- Prime Video, Amazon Music and more included
- Member-only deals all year
Spooky Halloween costume accessories are the details — theatrical contacts, fake blood, glow effects, weathered props — that turn an ordinary costume into something people remember. The best results come from three to five quality pieces chosen for your character, applied with basic makeup skills, and checked for safety (especially anything touching eyes, skin, or involving heat and flames).
The scariest costume at the party is almost never the most expensive one. It’s the vampire with crimson theatrical contacts, cracked porcelain skin, and a cape that smells faintly of stage fog. The $20 dress underneath? Nobody remembers it.
That’s the secret costume veterans know: accessories do the heavy lifting. A plain black outfit becomes a witch with the right hat, gnarled fingers, and a spine-chilling green glow. A boring suit becomes a ghost hunter with a flickering lantern and a weathered journal.
In this guide, you’ll learn which spooky accessories actually deliver, what they cost, how to use them without a trip to the ER, and which ones to skip entirely. Let’s build a costume people talk about until December.
Put roughly 60% of your costume budget into accessories and 40% into the base outfit — accessories create the spooky effect, not the clothes.
Buy theatrical contact lenses only with a prescription and fitting; non-prescription decorative lenses are illegal in the US and cause real eye injuries.
Apply accessories in order: contacts, prosthetics, base paint, dark details, blood last — and rehearse the full look a few nights before Halloween.
Choose three to five accessories that serve one character; mismatched props read as clutter rather than creepy.
Replace every real flame with LED equivalents and use only skin-labeled adhesives like spirit gum — never super glue.
Why Accessories Make or Break a Spooky Costume
Accessories decide whether your costume reads as “spooky” or “someone wearing a costume.” Faces and hands are where people look first — psychology research on face perception shows the human brain processes faces in a fraction of a second, and anything slightly off about them triggers unease. That’s the entire engine of horror.
Think about the last haunted house you walked through. The actors rarely wore full rubber monster suits. They wore normal clothes — plus pale contact lenses, darkened eye sockets, and one wrong detail, like fingers bent the wrong way. Cheap and slow-burn scary beats expensive and cartoonish.
A real example: my neighbor spent $150 on a deluxe grim reaper robe two years ago. It looked like a bathrobe with a hood. This year she spent $25 — a foam scythe, grey face paint, and black sclera-style lenses (prescription, more on that below) — and won the neighborhood contest.
Why does this work? Because fear is a signal-detection problem, not a costume problem. Your brain evolved to scan faces and hands for signs of threat or illness — pale skin, clouded eyes, unnatural posture — and to react before conscious thought kicks in. A costume that targets those ancient alarm bells feels scary even when the viewer can’t explain why. That’s also why accessories beat the outfit itself: the outfit is read as “clothes,” while a detail like blacked-out eyes is read as “something is wrong with this person.” The implication for your budget is simple — spend where the biology looks first.
If your costume budget is $100, put $60 into accessories and details, $40 into the base outfit. The math reverses what most people do, and it works.
7 Spooky Accessories That Deliver the Most Scare Per Dollar
The highest-impact spooky Halloween accessories are the ones that change your face, hands, or silhouette — because those are what people instinctively scan for threat signals. But not every accessory earns its price tag the same way. Some work because they exploit how people read faces; some because they add movement or light that the eye can’t ignore. Here’s what each one actually does, why it works, and what tradeoff you’re accepting.
- Theatrical contact lenses — white-out, blackout, or red. This is the single highest-impact accessory because the eyes are the first thing people check when deciding whether a face is “human.” Clouded or solid-black eyes short-circuit that check instantly. Expect $30–$80 per pair from legitimate sellers; the tradeoff is cost and the hassle of a prescription fitting — but that’s non-negotiable (see the safety section).
- Latex or gelatin prosthetics — wounds, stitches, horns, zombie cheek tears. These work because three-dimensional texture reads as “injury” in a way flat paint never can; a photo of painted-on stitches looks like makeup, while a raised gelatin wound makes people flinch. A $10 wound kit plus liquid latex genuinely beats a $60 full mask — masks hide your expressions, and expressionless is less scary than wrongly expressive. The tradeoff: application time and skin-prep effort.
- Stage-quality fake blood — gel blood stays put on skin; liquid blood drips realistically for costumes. Both run under $10, and the payoff is huge because blood tells a story — viewers’ brains immediately invent what happened to you. The tradeoff: cheap corn-syrup blood dries tacky, stains fabric, and looks orange in photos, so mid-range gel blood is worth the extra few dollars.
- Glow and LED pieces — glowing elixir bottles, LED-pumped veins, flickering lanterns. These matter because Halloween happens after dark, and the eye is drawn to moving light before almost anything else. A slowly pulsing green vein effect makes people lean in — and leaning in is exactly the reaction you want. The tradeoff: battery changes mid-party, and cheap novelty versions often die within the hour.
- Weathered props — a scythe, cane, ancient book, or birdcage. A brand-new prop reads as “store-bought” from across the room, and that kills the illusion. Weathering is the cheapest special effect there is: hit a prop with matte black spray paint, then dry-brush silver over the raised edges, and it suddenly looks like it came from an attic or a grave. Twenty minutes of painting does what $40 of “premium” molding tries to do.
- Creepy hand details — skeleton gloves, claw nail tips, or veined arm sleeves. Underrated because hands are the second place people look, and the one place you can’t hide them — you hand someone a drink, you gesture, you shake hands. Someone touching a skeleton-gloved hand gets a jolt of wrongness no cape can match. The tradeoff: gloves can interfere with actually holding things, so test grip before the party.
- Atmosphere carriers — a candelabra (LED candles, always), a jar of “specimens,” a music box. These are the slowest-burn but deepest-cut accessories, because they imply a backstory. A witch holding a jar of pickled “eyeballs” (lychees with blueberries inside — a classic trick) invites questions, and questions mean people are engaging with your character instead of glancing past it. The tradeoff: you have to carry them all night, so pick one, not three.
The lantern trick deserves special mention because it stacks three effects at once: moving light, moving shadows, and a silhouette that reads as “old-fashioned and wrong” at dusk. A ghost bride carrying a flickering LED lantern is genuinely unsettling in a way a plastic chainsaw never is — a chainsaw shouts, a lantern whispers, and whispers are scarier. If you can only add one accessory to a costume, make it a light source that moves.
Cheap vs. Quality Accessories: What’s Worth Paying For
Quality matters most for anything touching your skin or eyes and for props you’ll carry all night; it matters least for one-night decorative items. This table breaks down where to spend and where to save.
| Accessory | Cheap ($5–15) | Quality ($25–80) | Verdict |
|---|---|---|---|
| Contact lenses | No-name online, no prescription | FDA-approved, fitted | Always pay up — eyes are non-negotiable |
| Fake blood | Corn syrup party-store brand | Stage gel blood | Mid-range; gel blood worth it |
| Prosthetics | Pre-painted latex | Silicone + spirit gum | Spend if you want photos to hold up |
| Props (scythe, staff) | Hollow plastic | Foam-backed, painted | Upgrade only if carrying all night |
| LED/glow items | Button-cell novelty | Rechargeable LED | Save — one night is fine |
One honest exception: pre-painted cheap latex prosthetics look fine from five feet away at a dim party, and terrible in photos with flash. If your Halloween lives on Instagram, budget for silicone. The underlying rule: spend where failure hurts — your eyes, your skin, the prop in your hand for six hours — and save where failure is merely a dead battery in a novelty glow stick.
How to Apply Spooky Accessories in 5 Steps (Without Looking Like a Hot Mess)
A great accessory applied badly looks worse than no accessory at all. Follow this order and you’ll avoid the classic mistakes — peeling wounds, smudged blood, and paint cracking every time you smile.
- Start with clean, moisturizer-free skin. Prosthetic adhesive and face paint grip dry skin. Skip sunscreen and lotion on Halloween day. Why: oils create an invisible barrier, so adhesive lifts at the edges within an hour and paint slides — the difference between a wound that lasts the party and one that peels off by the first beer.
- Apply prosthetics first, before any paint. Blend edges with liquid latex, then set with translucent powder so they disappear into your skin. Why: paint covers the seam where prosthetic meets face; if you paint first, the seam stays visible and the whole piece reads as “stuck-on.”
- Layer face paint from light to dark. Base tone, then shading, then the dark details like sunken eyes. Sponges for coverage, small brushes for detail. Why: dark paint contaminates light paint on brushes and sponges — work the other direction and your grey base turns muddy.
- Add blood last. Gel blood over dried paint. Drip liquid blood only at the very end so it doesn’t smear everything it touches. Why: liquid blood never really “dries” on paint — apply it early and every accidental touch becomes a pink smudge across your cheekbone.
- Insert contacts before makeup — clean fingers, clean lenses, and do it over a towel so a dropped lens doesn’t hit the floor. Why: inserting lenses after makeup transfers paint particles onto the lens and into your eye, which is both painful and genuinely risky.
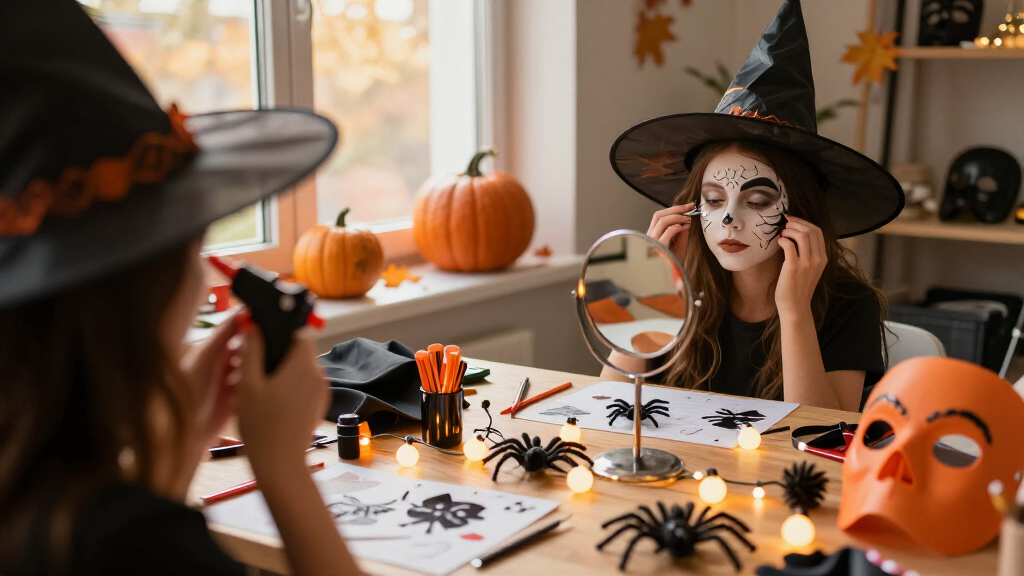
Do a full dress rehearsal a few nights before. Prosthetic application takes longer than you think — a decent zombie face is a 45-minute job, not a 10-minute one. Discovering that at 7 p.m. on October 31 is a horror story of the wrong kind. The rehearsal also tells you the practical things you can’t otherwise know: whether your claw tips let you hold a drink, whether your veiled hat survives a doorway, whether your skeleton gloves make your phone unusable — better to learn on October 28 than mid-party.
Safety Traps That Ruin Halloween (Read This Before Buying Anything)
The three accessories that send people to urgent care every Halloween are decorative contact lenses, aerosol face sprays, and open-flame props. Each has a safe version — but the dangerous versions are everywhere.
Contacts: Decorative lenses sold without a prescription are illegal in the US under FDA regulations. According to the American Academy of Ophthalmology, costume lenses cause corneal scratches, infections, and even vision loss every October. The mechanism matters: an ill-fitting lens scrapes the cornea with every blink, and a scratched cornea is an open door for bacteria — which is why a “just one night” lens can become a week of antibiotic drops or, in the worst cases, permanent vision damage. Get an eye exam and a fitting — many optometrists do it for under $50, and it’s valid for a year, so it covers future Halloweens too.
Adhesives and makeup: Never glue prosthetics with super glue or anything not labeled for skin. Super glue bonds to skin the way it bonds to wood — meaning removal means tearing your own skin off with it. Use spirit gum or prosthetic adhesive, and patch-test 24 hours before. A real-world example: every October, urgent care clinics treat people who super-glued horns to their foreheads and left with the horns and missing patches of eyebrow. That $2 tube of “hypoallergenic” party glitter? Check for cosmetic-grade labeling — craft glitter is cut from metal foil with sharp edges that can scratch corneas, while cosmetic glitter is rounded polyester.
Heat and flame: Skip real candles entirely. Halloween costumes are, by design, made of cheap synthetic chiffon and tulle — essentially kindling with a costume label. A chiffon sleeve near a taper candle can ignite in seconds, and melted synthetic fabric sticks to skin while burning. A flickering LED taper in a candelabra looks identical in photos and can’t ignite anything. If your prop involves fog fluid or spray effects, use it in ventilated spaces — enclosed porches and dense fog machines are a bad mix, both for breathing and because some fog fluids leave a slippery film on floors.
One rule covers everything: if it touches your eyes, skin, or an open flame, buy it from a reputable theatrical or cosmetics brand — not the discount bin at a pop-up Halloween store. The $8 you save is never worth the urgent care copay.
Match Accessories to Your Character: 3 Ready-Made Combos That Work
The fastest way to a coherent spooky look is picking a character archetype and choosing every accessory to serve it. Mismatched accessories — devil horns plus zombie wounds plus a pirate hook — read as clutter, not creep. Why? Because fear requires a story the viewer can almost follow: “something is wrong with this bride” is scary, while “this person wore everything Spirit Halloween had” is just a party costume.
The Drowned Bride
Pale grey-white face paint, darkened eye sockets, a veil, one LED “glowing” ring, and dripping gel blood from the hairline. Seaweed-green shading at the jaw sells the waterlogged effect — the trick is that green tint where skin “shouldn’t” be, which reads as decay to the eye even before the brain names it. Total accessory cost: about $35.
The Plague Doctor
A beaked mask (upgrade the strap — the stock elastic always snaps by hour two), a wooden cane, a leather-look satchel of dried herbs, and fingerless gloves. Add a small Bluetooth speaker playing low crow sounds for the full dread effect — sound is the most underused spooky accessory of all, because people hear it before they see you coming.
The Porcelain Doll
White base paint with drawn crack lines, circle-blush cheeks, painted lash lines, a bow, and one deliberately too-still porcelain hand. Pair with a music box you wind slowly. Cost: under $20 in paint alone. This one works through stillness rather than gore — the scariest moment is when someone realizes you haven’t blinked or moved your hand in a full minute.
Notice what these have in common: three to five accessories each, all pulling the same direction. Restraint is what makes them creepy, because one coherent wrongness is a story while five competing ones are noise. A costume that hints at wrongness beats one that shouts.
Frequently Asked Questions
Are decorative Halloween contact lenses safe?
Only when purchased with a prescription and professional fitting. Non-prescription decorative lenses are illegal to sell in the US, and the American Academy of Ophthalmology reports costume-lens injuries every October, including corneal abrasions and infections. An optometrist fitting usually costs under $50 and keeps your eyes safe.
How do I make fake blood look realistic?
Use gel blood for wounds — it stays in place and has a three-dimensional texture that photographs well. Add liquid blood only at the very end for controlled drips. For realism, most store-bought blood is too bright; a drop of blue or green food coloring deepens it toward venous blood.
What’s the best glue for costume prosthetics?
Spirit gum or dedicated prosthetic adhesive — both are formulated for skin and remove with the matching remover. Never use super glue or hot glue on skin. Patch-test any adhesive 24 hours before Halloween to check for reactions.
How many accessories should a spooky costume have?
Three to five is the sweet spot, all matching one character. More than that and the look becomes cluttered. Prioritize anything that changes your face, hands, or silhouette — those register first and carry the scare.
How far in advance should I buy Halloween accessories?
Buy in late September or early October for the best selection — popular items like quality contact lenses and silicone prosthetics sell out by mid-October. Do a full dress rehearsal at least two or three nights before Halloween so you have time to fix problems.
Conclusion
If you remember one thing: spooky lives in the details — the eyes, the hands, the one wrong thing people can’t quite name. Three well-chosen, safely-sourced accessories will out-scare a shopping cart full of plastic every single time.
So pick your character, do one dry run before the 31st, and check every item against the safety list. Then walk into that party slowly, lantern flickering, and enjoy the moment someone takes an involuntary step back.
Halloween Picks
halloween
As an affiliate, we earn on qualifying purchases.